How to add facebook widget to blogger

As you know, Facebook has been implemented by most of bloggers, and Facebook has created a great oportunity for us to increase number of loyal readers just by one click. So, have you got a cool Facebook fan page widget? If not, this tutorial would be for you. I will show you how to add facebook widget to blogger in a absolutely cool way with hover effect. You can see the demo here. And you can implement it for your blog also. What you need to do is following exactly the steps below:


Step 1: Add Jquery Javascripts plugin (if your blog is already added this plugin, you can skip this step)
  1. Go to Design / Templates  >>  Edit Templates  >>  Tick the expand widget templates box
  2. Find the tag </head>  (Press Ctrl + F to find it)
  3. Place this code right above the tag </head>
  4. <script src="https://ajax.googleapis.com/ajax/libs/jquery/1.6.1/jquery.min.js" type="text/javascript"></script>
  5. SAVE the templates
Step 2: Add Facebook widget code to blogger
  1. Go to Page Elements / Layout  >>  Add a Gadget  >>  HTML/Javascripts
  2. Place the code below into the content box
    1. <script type="text/javascript">
      //<!--
      $(document).ready(function() {$(".w2bslikebox").hover(function() {$(this).stop().animate({right: "0"}, "medium");}, function() {$(this).stop().animate({right: "-250"}, "medium");}, 500);});
      //-->
      </script>
      <style type="text/css">
      .w2bslikebox{background: url("https://blogger.googleusercontent.com/img/b/R29vZ2xl/AVvXsEhcLkURmibP8uySz3pSv5YkR0SNM-xuMoLb7Yk2fK-RX_pnqxbBN9CNyI4B0RXDL94b2YBsmulctZ1YjFVfvSzu26_NoR_LSC_YYj9fUI3mmRgJm1vQI1ZI7SbhVFJ4kK7WW46eSRAKSlTM/s150/w2b_facebookbadge.pn") no-repeat scroll left center transparent !important;display: block;float: right;height: 270px;padding: 0 5px 0 46px;width: 245px;z-index: 99999;position:fixed;right:-250px;top:20%;}
      .w2bslikebox div{border:none;position:relative;display:block;}
      .w2bslikebox span{bottom: 12px;font: 8px "lucida grande",tahoma,verdana,arial,sans-serif;position: absolute;right: 6px;text-align: right;z-index: 99999;}
      .w2bslikebox span a{color: #808080;text-decoration:none;}
      .w2bslikebox span a:hover{text-decoration:underline;}
      </style><div class="w2bslikebox" style=""><div><iframe src="http://www.facebook.com/plugins/likebox.php?href=http%3A%2F%2Fwww.facebook.com%2Fpages%2FBlog-On-Blogspot%2F114178088675094&amp;width=245&amp;colorscheme=light&amp;show_faces=true&amp;connections=9&amp;stream=false&amp;header=false&amp;height=270" scrolling="no" frameborder="0" scrolling="no" style="border: medium none; overflow: hidden; height: 270px; width: 245px;background:#fff;"></iframe><span>/ <a href="http://www.blogonblogspot.com/">+Gadget</a></span></div></div>
  3. SAVE
More

Mashable Like Floating Social Bookmarking Widget For Blogger

Its been a while many got impressed with Mashable’s floating social bookmarking widget and many tried and came up with a wordpress plugin. But actually people forgot about creating a floating social bookmarking plugin for blogger. So here in this post, I am going to teach how to add floating social widget to your blogger/blogspot blogs.
Floating Social Bookmarking Widget for Blogger
Step 1: Navigate to Edit HTML from Blogger dashboard and check Edit Widget Template. Search for ]]></b:skin> and replace it with the below code
#sharebox {
background
-color:#FFFFFF;
border
-color:#C1CDCD;
border
-style:solid;
border
-width:1px;
left
:103px;
bottom
:40px;
margin
-top:10px;
position
:fixed;
width
:64px;
}
#sharebox .float {margin:7px}
.FBConnectButton_Text
{
font
-size: 8px;
padding
:2px 4px 3px !important;
}
]]></b:skin>
Step 2: This step involves inserting the widget functions into your template. Therefore, place the below code before <div class='post-header-line-1'/>
<b:if cond='data:blog.pageType == &quot;item&quot;'>
<div id='sharebox'>
<div class='float'><script src='http://tweetmeme.com/i/scripts/button.js' type='text/javascript'/></div>
<div class='float'><a href='http://www.facebook.com/sharer.php' name='fb_share' type='box_count'>Share</a><script src='http://static.ak.fbcdn.net/connect.php/js/FB.Share' type='text/javascript'/><div class='clear'/></div>
<div class='float'><a class='google-buzz-button' data-button-style='normal-count' href='http://www.google.com/buzz/post' title='Post on Google Buzz'/>
<script src='http://www.google.com/buzz/api/button.js' type='text/javascript'/></div>
<div class='float'><script src='http://www.stumbleupon.com/hostedbadge.php?s=5'/></div>
</div>
<a href='http://www.bloggermint.com/2010/06/mashable-like-floating-social-bookmarking-widget-for-blogger/'><font size='0.3'>Bloggermint</font></a>
</b:if>
Thats it and remember, the floating widget is visible only for blog post, so this widget won’t be visible on your blog homepage. If you need any customization on this widget, drop in your comments and you can also leave your questions at Bloggermint Answers
More

SEO plug-in for Blogger blogs

SEO plug-in for Blogger blogs

Confused? You shouldn’t be. You might have read about so many SEO plug-ins which are available for WordPress blogs. It’s a little sad that Blogger doesn’t provide built-in SEO plug-ins for Blogger blogs.
Did you ever hear about “SEO Blogger“? This is what I’m going to share in this post.
As the name suggests, SEO Blogger is a SEO plug-in for Blogger blogs which works with Google Chrome and Mozilla Firefox. After adding this plug-in, you can optimize your Blogger post for search engines just after you publish it. This plug-in will ask you to add description and keywords for your post just after you hit publish button (as in the image below).
 SEO plug in for Blogger blogs

What will SEO Blogger plug-in do?

SEO Blogger will add the ‘Description’ and ‘Keywords’ for the respective post in the blog template as we did it manually in one of my post (How to add meta-tags for individual blogger blog post?)
The code which will be added in the post will be same as in the above post but with this plug-in you can do it just after publishing your post.
When you’ll click on ‘Submit’ the code like in the following image, will be added to you template;
 SEO plug in for Blogger blogs

Get this Plug-in

To use this plug-in, you have to work with the old interface of Blogger. As I said above, this plug-in will work with Chrome and Firefox, so if you are using some other browser, then you have to switch to one of these browser in order to work with this plug-in.
Steps to get this plug-in;
  1. Back-up your template (How and Why).
  2. Install Grease Monkey Add-on (click here) , first. (only for Firefox users. Chrome has this script, already)
  3. Now, click here to install SEO Blogger script.
  4. Restart you browser.
That’s it, you are done. Now you can go to your post editor, write down your article and add the keywords and description of your article just after you hit publish.
Note: After you hit Submit button, you may have to wait for few seconds to let the plug-in do it’s work.
I hope it will help you to optimize your blog post for search engines, easily.
Do you know about any other SEO plug-in for Blogger or may be for WordPress?
Share with us.
More

28 Blogger Widgets And Plugins

Blogger platform has undergone major improvements in last two years. Not only the blogger development team has added several new features to the platform,, but countless new blogger templates are being developed around the globe. Here are some best widgets and plugins for blogger powered blog that can spice up your blog for better reader experience.
Blogger Widgets And Plugins

1. Top Commentators Widget by BloggerPluginsThis excellent plugin has two versions. One for blogs having small number of comments and the second variant for blogs receiving lots of comments.

2. Translation Widget by BloggerPluginsThis one click install widget add multiple language translation support to your blogger blog.
3. Recent Post Widget by BloggerPluginsThis is highly customizable widget. You can set number of posts to display, post summary and it’s length.
4. Recent Comments Widget by BloggerPluginsA highly customizable widget. You can set the number of comments to display, author name, date and size of comment. You can also use CSS to gel it with your theme.
5. Label Cloud Plugin by phydeaux3This is one of the most popular label cloud generation plugin for blogger. You can customize various options after installing this plugin.
6. Archive Calendar Widget by PurpleMoggyVery impressive archive calendar widget with customizable options.
7. Archive Calendar Widget by phydeaux3Another very popular archive calendar widget. Highly customizable for better browsing experience for the readers.
8. Recent Posts Widget by Feed2JSThis excellent plugin makes plugin installation and customization very easy. Just fill in the form and click the button to generate widget code.
9. Recent Comments Widgets by Blogger-TemplatesJust fill in the options in the form and one click widget code generation. Excellent plugin which is highly customizable.
10. Picasa Web Albums Slideshow Widget by Blogger Templates DesignsA unique plugin to show photo slideshow from any picasa account. Ideal for personal blogs, photo blogs and web design blogs.
11. Search Form Widget by Blogger Templates DesignsIf you want to add site search box in your blog’s sidebar, install this plugin.
12. Google Talk Widget by Blogger Templates DesignsThis plugin adds the Google Talk client to your blog so that your readers can directly converse with you.
13. Recent Comments Widget by Blogger Templates DesignsYet another recent comments widget with customizable options and one-click install.
14. Sudoku Game Widget by Blogger Templates DesignsWant to add some interesting puzzle games for your visitors? Then install this plugin to integrate sudoku puzzle game in your blogger blog.
15. Google Translate Mini-Flags Widget by MadToMatoeVery useful translation plugin powered by ‘Google Translate’. One click install with multiple language translation facility.
16. Recent Comments Widgets by MadToMatoeOne more recent comments widget for blogger blogs. Again you can customize the number of recent comments to be displayed.
17. Reactions Mini-Poll Widget by ThemeLibWant to host a poll on your blogger blog? Install this plugin and get customizable polls for your readers.
18. Alexa Traffic Widget by TechKnowlDisplay your Alexa stats with this customizable widget.
19. Snow Flakes Widget by TechKnowlAdd a stunning snowfall effect in your blogger template in the festive season.
20. Popular Posts Widget by TechKnowlA very simple popular posts plugin using Yahoo pipes to filter out popular posts on your blog.
21. Flash MP3 Player Widget by TechKnowlThis cool plugin allows you to embed flash mp3 player in your blogger blog. The player is very light with custom options.
22. Related Content Widget by OutbrainIf you want to integrate related content system with your blogger posts, then this excellent plugin is the best choice. It has rating system plus related posts integration in same widget.
23. Tab View Widget by HoctroThe coolest plugin showing tabbed posts with animated post excerpts. A must for your blog’s sidebar.
24. Random/Rotating Banner Widget by FreeYaSoulVery useful widget for displaying rotating banners in your blog’s header. You can customize and can choose any number of headers.
25. What’s Next? Section Widget by eblogtemplatesIntegrate a WordPress style ‘What’s Next’ section below blogger posts with this excellent widget.
26. Twitter Profile Widget by BloggerBusterAdd your twitter profile and twitter updates with this useful plugin developed by Amanda Fazani.
27. Bookmarking Widget by SocioFluidOne of the best social bookmarking plugin for blogger. Big animated icons with one click installation.
28. Advanced Recent Comments Widget by CsabiThis is highly customizable recent comments widget. The number of configurable options provided by this widget makes it one of the best recent comment widgets for blogger platform.
More

Default Web Browser ของIE,Chrome,Firefox,Opera,Safari

วันนี้ผมต้องแอบเขียนบทความนี้นะครับแบบว่า มันมีเวลาน้อยเอาอะไรง่ายๆๆก่อนแล้วกันนะครับ

Default Web Browser เปลี่ยนค่าปริยาย เป็นเว็บบราวเซอร์เริ่มต้น IE,Chrome,Firefox,Opera,Safari บทความนี้ไม่เกี่ยวข้องโดยตรงกับการเขียนโปรแกรม แต่ก็ใช่ไม่จะไม่เกี่ยวข้องเลย เพราะในทางปฏิบัติถ้าหาเราเขียนโปรแกรมแสดงบนผล Web Browser จำเป็นจะต้องติดตั้ง Web Browser หลาย ๆ ตัวในเครื่องเดียวกัน เพื่อทดสอบการทำงาน ดังนั้นลงติดตั้งหลาย ๆ ตัวปัญหาการ Set ให้เป็น Default Web Browser เริ่มต้นก็ย่อมมีแน่นอน ฉะนั้นบทความนี้จึงได้รวบรวมวิธีการเปลี่ยนแปลงค่าในWeb Browser ต่าง ๆ ซึ่งครอบคลุมค่ายดัง ๆ ที่ได้รับความนิยมเช่น Internet Explorer (IE) , Google Chrome , Mozilla Firefox , Opera และ Safari
1. Internet Explorer (IE) การเปลี่ยน Default Web Browser ใน Internet Explorer (IE)
เปิดหน้า Web Browser ของ Internet Explorer (IE)
Internet Explorer (IE) Default Web Browser
ไปทีเมนู Tools - > Internet Options
Internet Explorer (IE) Default Web Browser
ไปที่ Tab ที่ชื่อว่า Programs ให้คลิกที่ Make default ตามรูป


2. Google Chrome การเปลี่ยน Default Web Browser ใน Google Chrome
เปิดหน้า Web Browser ของ Google Chrome
Google Chrome Default Web Browser
เลือก Settings ตามรูป
Google Chrome Default Web Browser
เลื่อนลงมาประมาณช่วงกลาง ๆ จะมีให้คลิกที่ Make Google Chrome my default browser


3. Mozilla Firefox การเปลี่ยน Default Web Browser ใน Mozilla Firefox
เปิดหน้า Web Browser ของ Mozilla Firefox
Mozilla Firefox Default Web Browser
คลิกที่เมนู Tools -> Option
Mozilla Firefox Default Web Browser
คลิกที่ Tab ของ Advanced -> General คลิก Checkbox ว่า Alway check to see if Firefox is the default browser on startup และคลิกที่ Check Now
Mozilla Firefox Default Web Browser
จะมีหน้าจอยืนยันให้คลิกที่ Yes


4. Opera การเปลี่ยน Default Web Browser ใน Opera
เปิดหน้า Web Browser ของ Opera
Opera Default Web Browser
คลิกที่เมนู Opera -> Settings -> Preferences ตามรูป
Opera Default Web Browser
คลิกที่ Tabs ของ Advanced -> Programs คลิกเลือก Checkbox ที่ว่า Check if Opera is default browser on startup และ OK ตามลำดับ
- Max OS
ให้คลิกที่ Preferences > General ส่วนของ Default Web Browser ให้เลือก Opera


5. Safari การเปลี่ยน Default Web Browser ใน Safari
เปิดหน้า Web Browser ของ Safari
Safari Default Web Browser
คลิกที่เมนู Setting -> Preferences (ตามภาพ)
Safari Default Web Browser
คลิกที่ Tabs ของ General ในส่วนของ Default web browser : ให้เลือกเป็น Safari


หลังจากเปลี่ยนเรียบร้อยแล้ว เมื่อคลิก Link จาก Application ต่าง ๆ ที่ทำการเปิด Web Browser ก็จะเรียก Browser ที่ได้กำหนดค่า Default ไว้
Default Web Browser
โดยสังเกตุว่า Icons ต่าง ๆ ที่เป็นพวก .html หรือ .htm ที่เปิดด้วย Web Browser จะมีการเปลี่ยนไปตาม Icons ของ Web Browser ที่เป็น Default
More

มาฝากไฟล์ HTML,CSS,Javascript และอื่น ไว้ใช้งานด้วยGoogle code กันเถอะ

สวัสดีครับหลังจากหายไปนานวันนี้ผมก็มากับ วิธีแปลกๆแต่คุนต้องชอบมันแน่ สำหรับคนอยากอับไฟล์ HTML เพื่อมาใช้กับ blog แต่ไม่มี host  เป็นของต้นเอง จะไปใช้ host ฟรีมันก็ติดโฆษณาเยอะด้วยอะไรก็ไม่รู้ ผมของแนะนำ Google code อีกแล้วครับ หลังจากที่แนะนำการฝากไฟล์ java Scirpt แบบไม่จำกัดกับ Google code แล้วก็ตาม หรือถ้าใครยังไม่เคยอ่านก็ไปที่ ฝากfile js. กับ Google นะครับ
ฝากไฟล์ HTML,CSS,Javascript
ตัวอย่างก็นี้เลย    https://plugublog.googlecode.com/svn/trunk/html/Navigation%20Menu%20with%20Jquery-demo.html    ฮาๆๆๆ อยากรู้วิธีใหมครับเพื่ออยากจะเอาไปใช้ ถ้าอยากเอาไปใช้ก็ตามนนี้เรา
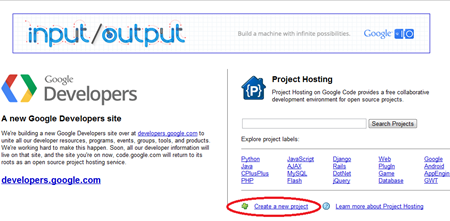
1. ไปที่ Google code login เข้าไปหรัสก็ตัวเดียวกันกับ blog ท่านนั้นละครับ
2. เลือกสร้าง project  หรือใครมีแล้วก็ข้ามไปดู ข้อ4 เลยนะครับ
ฝากไฟล์ HTML,CSS,Javascript
3. กรอกขอมูลลงไปดังภาพต่อไปนี้
ฝากไฟล์ HTML,CSS,Javascript
โดย ที่ Version control system นั้นต้องเลือกเป็น Subversion นะครับ
4.ไปที่ source ตามภาพนะครับ
ฝากไฟล์ HTML,CSS,Javascript
ตัว ที่เน้นสีแดงนั้น จงจดจำไว้เพราะจะต้องได้ใช้ต่อไปนะครับมันจะเป็น url สำหรับอับโหลดไฟล์นะครับ  แล้วไอ้ตัวเน้นสีส้มนั้นให้คุณคลิกเข้าไปเพื่อไปดูหรัสของ Google ของคุณนะครับ  ซึ่งเมื่อเข้าไปจะมีรูปแบบดังนี้
ฝากไฟล์ HTML,CSS,Javascript
ไอ้ตัวที่ผมเน้นสีแดงควรจดจำไว้เพราะจะได้เอาไปใช้ในการอับโหลดไฟล์นะครับ
เมื่อเราได้ขอมูลที่เราต้องการแล้วเราก็ไปโหลดเจ้าตัวนี้มานะครับเป็นโปรแกรมที่ใช้ช่วยในการอับไฟล์ เอิกๆๆ ใช้ได้ดีด้วย
6.โหลดได้ที่ Download  เมื่อโหลดมาแล้วก็ติดตังใส่คอมคุณเถอะนะจะได้เอามาใช้ต่อไปนะครับ
7. ไปที่ Desktop หรือ เปิด openwindows ของ folder อะไรก็ได้ครับแล้วก็คลิกขวาเลือกที่ TortoiseSVN > Settings ดั้งภาพต่อไปนี้
ฝากไฟล์ HTML,CSS,Javascript
8.แล้วนำโค้ดต่อไปนี้ไปวางไว้ต่อด้านล่างสุดหรือต่อจากบรรทัดสุดท้ายนะครับ

[miscellany]
enable-auto-props = yes

[auto-props]
# Scriptish formats
*.bat = svn:eol-style=native; svn:keywords=Id; svn-mine-type=text/plain
*.bsh = svn:eol-style=native; svn:keywords=Id; svn:mime-type=text/x-beanshell
*.cgi = svn:eol-style=native; svn:keywords=Id; svn-mine-type=text/plain
*.cmd = svn:eol-style=native; svn:keywords=Id; svn-mine-type=text/plain
*.js = svn:eol-style=native; svn:keywords=Id; svn:mime-type=text/javascript
*.php = svn:eol-style=native; svn:keywords=Id Rev Date; svn:mime-type=text/x-php
*.pl = svn:eol-style=native; svn:keywords=Id; svn:mime-type=text/x-perl; svn:executable
*.pm = svn:eol-style=native; svn:keywords=Id; svn:mime-type=text/x-perl
*.py = svn:eol-style=native; svn:keywords=Id; svn:mime-type=text/x-python; svn:executable
*.sh = svn:eol-style=native; svn:keywords=Id; svn:mime-type=text/x-sh; svn:executable

# Image formats
*.bmp = svn:mime-type=image/bmp
*.gif = svn:mime-type=image/gif
*.ico = svn:mime-type=image/ico
*.jpeg = svn:mime-type=image/jpeg
*.jpg = svn:mime-type=image/jpeg
*.png = svn:mime-type=image/png
*.tif = svn:mime-type=image/tiff
*.tiff = svn:mime-type=image/tiff

# Data formats
*.pdf = svn:mime-type=application/pdf
*.avi = svn:mime-type=video/avi
*.doc = svn:mime-type=application/msword
*.eps = svn:mime-type=application/postscript
*.gz = svn:mime-type=application/gzip
*.mov = svn:mime-type=video/quicktime
*.mp3 = svn:mime-type=audio/mpeg
*.ppt = svn:mime-type=application/vnd.ms-powerpoint
*.ps = svn:mime-type=application/postscript
*.psd = svn:mime-type=application/photoshop
*.rtf = svn:mime-type=text/rtf
*.swf = svn:mime-type=application/x-shockwave-flash
*.tgz = svn:mime-type=application/gzip
*.wav = svn:mime-type=audio/wav
*.xls = svn:mime-type=application/vnd.ms-excel
*.zip = svn:mime-type=application/zip

# Text formats
.htaccess = svn:mime-type=text/plain
*.css = svn:mime-type=text/css
*.dtd = svn:mime-type=text/xml
*.html = svn:mime-type=text/html
*.ini = svn:mime-type=text/plain
*.sql = svn:mime-type=text/x-sql
*.txt = svn:mime-type=text/plain
*.xhtml = svn:mime-type=text/xhtml+xml
*.xml = svn:mime-type=text/xml
*.xsd = svn:mime-type=text/xml
*.xsl = svn:mime-type=text/xml
*.xslt = svn:mime-type=text/xml
*.xul = svn:mime-type=text/xul
*.yml = svn:mime-type=text/plain
CHANGES = svn:mime-type=text/plain
COPYING = svn:mime-type=text/plain
INSTALL = svn:mime-type=text/plain
Makefile* = svn:mime-type=text/plain
README = svn:mime-type=text/plain
TODO = svn:mime-type=text/plain

# Code formats
*.c = svn:eol-style=native; svn:keywords=Id; svn:mime-type=text/plain
*.cpp = svn:eol-style=native; svn:keywords=Id; svn:mime-type=text/plain
*.h = svn:eol-style=native; svn:keywords=Id; svn:mime-type=text/plain
*.java = svn:eol-style=native; svn:keywords=Id; svn:mime-type=text/plain
*.as = svn:eol-style=native; svn:keywords=Id; svn:mime-type=text/plain
*.mxml = svn:eol-style=native; svn:keywords=Id; svn:mime-type=text/plain


ก็ได้ดังรูปดังต่อไปนี้


ฝากไฟล์ HTML,CSS,Javascript


เสร็จแล้วก็ save นะครับ


9.คลิกขวาที่Desktop หรือ เปิด openwindows ของ folder อะไรก็ได้นะครับแล้วเลือก TortoiseSVN > Repo-browser ดั้งภาพ


ฝากไฟล์ HTML,CSS,Javascript


ก็ จะปรากฎกล่องให้ใส่ข้อมูล URL ลงไป ให้เราใส่ URL ที่ผมให้จดจำไว้อันแรกนะครับ ตั้วสีแดงอันแรก อย่าบอกนะว่าลืมกันแล้วถ้ายังไม่ลืมก็ใส่กันลงไป ดั้งรูปต่อไปนี้


ฝากไฟล์ HTML,CSS,Javascript


พอ ใส่เสร็จแล้วก็กด ok นะครับ แล้วก็รอ แล้วก็ รอ พอเสร็จแล้วมันจะมีกล่องขึ้นมาถาม useser และ password นะครับ ก็ให้ใส่ ตัวมี่ผมบอกให้จดจำอันที่สองนะครับ ตัวสีแดงอันที่สองนะครับ คือ useser ก็อันเดียวกันที่ใช้ login ของblogger ท่านนะครับ ส่วน pass ก็ pass google ที่ให้จำไว้อันที่สองนะครับ อธิบายขนาดนี้ไม่เข้าใจจะว่าไงแล้ว


วิธี อับโหลดก็ง่ายๆครับ ลาก file หรือ folder อาลง หรือ คลิดขวาที่โปรแกรมก็ได้ถ้าคลิกขวาจะมีคำสั้ง Add file กับ add folder เลือกเอาครับว่าจะอับแบบใหน


ไม่เข้าใจก็ถามได้นะครับ
More

How To Add Facebook Comment Box To Blogger Blogs

Facebook comment box is one of the useful tool for bloggers to increase conversations. Recently Facebook has launched many social plugins for bloggers and web developers and one such is improved Facebook comment box. So here in this post I will teach you how to add/integrate Facebook comment box to blogger in simple steps. Before getting into the process I recommend you to back up your template and previous comments in blogger wont be visible if you use Facebook commenting system.
Step 1: Visit Facebook developer page and enter your blog name, URL and click on Create application.
Facebook comment system for blogger
Now copy the App ID and save it in a notepad
Facebook comment box for blogger
Step 2: Login to you Blogger dashboard and navigate to Layout > Edit HTML and check on Expand Widget Templates. Search for the code <data:post.body/> or <div class='post-header-line-1'/> and paste the code below <data:post.body/> or <div class='post-header-line-1'/> and save the template.
<b:if cond='data:blog.pageType == &quot;item&quot;'>
 
<p align='left'><img alt='' class='icon-action' src='https://blogger.googleusercontent.com/img/b/R29vZ2xl/AVvXsEjs7fkujMFSB4pPTQDf12P1zEzNB6feG9QOLxaXlvXAI4ffDlUSQzlt4bahvhEno9nf8qN49xWOHLQ94LHQWvaqf3jEtp3rouquj1ZitlChB6_p6EMyKVq8bGGo6Tmr8gzoA0UjBxe9hs9f/s1600/cmds.png'/></p>
 
<div id='fb-root'/>
 
<script>
  window
.fbAsyncInit = function() {
  FB
.init({appId: &#39;APPID&#39;, status: true, cookie: true,
  xfbml
: true});
 
};
 
(function() {
 
var e = document.createElement(&#39;script&#39;); e.async = true;
  e
.src = document.location.protocol  +
 
&#39;//connect.facebook.net/en_US/all.js&#39;;
  e
.async = true;
  document
.getElementById(&#39;fb-root&#39;).appendChild(e);
 
}());
 
</script>
 
<fb:comments/>
 
</b:if>
Change the APPID on the code with your APP ID provided from Facebook and save the template.
Step 3: Now you need to hide default blogger commenting system. So navigate to Settings > Comments and select hide and save settings.
Facebook comment box for Blogger
Note: Using Facebook Comments will hide your blogger comments. So use this comment box wisely.
More

Threaded Comments For Blogger


Blogger has just announced the much awaited feature "Threaded Comments For Blogger" and you might have already seen it on your Blog if you are using a default Blogger Template. If you are using your own custom Template, then you will have to tweak your template for the threaded comments to appear.
This is how the Threaded Comments will look like (Screen shot taken form the Official Blogger Buzz Blog)
single level thread on blogger

How to get the Threaded Comments ?

1. Make sure that you have enabled Comment Feeds
2. Use the Embedded Comment Form.
3. Now If you are not seeing the Threaded Comments, then it means that you have a customized template.
There are different methods to fix this. But before doing any of those download a backup of your Template.
On the Old UI, you can get a backup at option in Design > Edit HTML > Download Full Template
threaded comments in blogger
If you are using the New UI, then you can find the same at Template > Backup/Restore (Right Side) > Download full Template
threaded comments in blogger

Tweaks to get the Threaded Comments:

1. The simplest method is to reset each of your Widgets to default. Doing this will revert back any customization which you or the template designer has made to the Widgets.
You can reset the widgets by going to the Edit HTML page, and clicking on the link which says “Revert widget templates to default” . If you tried this and lost your Customizations, you can always get them back by re-uploading your Template using the Backup/Restore option
2. If you don’t want to reset the widget templates, then you will have to manually Edit your template.
Find each occurrence of this snippet
<b:include data='post' name='comments'/>
and replace it with
<b:if cond='data:post.showThreadedComments'>
<b:include data='post' name='threaded_comments'/>
<b:else/>
<b:include data='post' name='comments'/>
</b:if>
and you should probably see the threaded view on your blog. If that too doesn’t help leave a comment here and we will try to debug it together :-)
Once you enable the threaded comments, your blog will by default show the 200 oldest comments, and you will see a load more link which will help the reader in viewing the rest of the comments
More

Redirect one page to another in Blogger

Blogger has launched an Array of Search Engine related features and one of them is the ability to create Custom Redirects. Technically Blogger allows you to create 302 Redirects which are used to specify that the Web Page has temporarily moved to a new location.

What is a redirect ?

A visitor coming to a particular web address is redirected to another web address. This process is called Redirect. Blogger allows you to create Internal Redirects which means that you will be able to redirect the user coming to a particular URL on your blog to another URL on your Blog.

When are Blogger Redirects Useful?

Consider a situation where a page on your Blog was really popular and later you decided to delete it for some reason. Since that page is popular, references to that URL might be there at multiple Blogs/Websites which linked to you. The users coming to that popular URL will now be greeted with a 404 Page not Found Error. You might be loosing some potential readers/subscribers here. One way of resolving this would be to redirect the guy to some other relevant page. This is exactly what Blogger’s Custom Redirects do.
You can also use the Blogger Redirection Tool to create short links. For example you might want to redirect yourblog.blogspot.com/yourname to  your contact page. You can do that easily using the Blogger’s Redirect Tool.

How to add Redirects?

I will describe this using an Example. I had a post about Meta Tags on my Blog. This entry was made some 4 years back  and when Blogger launched the new Search Options, it became irrelevant. So I just deleted that post and made a new entry in my Blog with the new details. Now the visitors coming to that 4 year old URL from various sources would be greeted with a 404 error. I don’t want that to happen but I need that user to be sent to my new Blog Post.
  1. To do a Redirect you should have 2 URLs. The first one is the URL which should be redirected to the target. The target is the second URL where the user should be redirected to.
  2. The second thing that you have to do is to get the relative paths of these URLs.e.g.: The relative path to http://www.bloggerplugins.org/2008/06/meta-tags-for-blogger-blogspot.html is  /2008/06/meta-tags-for-blogger-blogspot.html . You might have already figured out that you should remove your Blog’s home page URL from the URL to get the relative path. You should also make sure that the Relative path starts with a slash (/)
  3. Similarly you have to figure out the relative path to the Target URL. I opted for /2012/03/add-meta-description-tags-to-blogger.html
  4. Once you have got these 2 Relative paths, you can do the Redirect at Settings > Search Preferences > Errors & Redirects > Custom Redirects Add the From and To Fields there and click on the Save link and then on the Save Settings ButtonCustom Redirect Settings Blogger
  5. You can add more Redirects in a similar way.

Demo

Check out the following URLs and see how these get redirected
  1. A Post which is no longer there http://www.bloggerplugins.org/2008/06/meta-tags-for-blogger-blogspot.html
  2. A Custom Short URL that I made http://www.bloggerplugins.org/contact
Both of these URLs will get redirected to a different page instead of showing a 404 Page.
More

Custom Permalinks for Blogger Posts

A permalink (or permanent link) is a URL that points to a specific blog entry after it has passed from the front page to the archives.Blogger generates this permanent link based on your post title(If the title is in English). For example if your post title is “Hello World”, the blog post’s permalink would be something like http://yourblog.blogspot.com/2012/06/hello-world.html   Till date Blogger never allowed the user to control what the permalink should be but it rather assigned a permalink on it’s own.
This has now changed and Blogger now allows YOU to decide what the permalink of your new post should be. This feature is currently available in Blogger’s Draft Version. So if you would like to check it out, head straight over to http://draft.blogger.com and create a new post. In the post options you will see a permalink option.
image
If you select the “Automatic URL” (the default option), then Blogger will generate the permalink on it’s own. If you want to specify a custom URL, opt for the “Custom URL” option and you can enter your custom post permalink over there. It will allow you to enter alphabets, hyphens and underscores. It will just ignore underscores. So I just used a combination of hyphens and alphabets to create my post permalink
image

The Final Permalink will be something like
http://yourblogaddress/yyyy/mm/the custom URL that you specified
In my case it came to something like
http://myblog.blogspot.com/yyyy/mm/custom-permanent-link.html
Blogger doesn’t allow you to modify the Permalinks of old posts but you can make use of this new feature on your new posts  There seems to be no limit to the length of this Custom URL at the moment but Blogger might impose some length limit in future.
More

Add Meta Description Tags to Blogger

Meta Tags are HTML elements used to provide structured metadata about a web page. Such tags are placed in the head section of an HTML document and Search Engines might use this data to display the search snippet when they display a page from your blog. Most of the Social Sharing Tools like the Facebook Share or the Google Plus buttons will pick up this meta description to create the snippet which gets shared to the Social Networks.
 

How to add Meta Description Tags

Blogger has rolled out an array of SEO features and now adding Meta Tags has become so easy. You can do it easily from the Blogger’s User Interface without doing much of Template Editing or pulling your hair. So here is how to do it
  1. Go to Settings > Search Settings and Enable Meta Tags. In the Text area give a 150 character description which will describe your Blog. This text might be used by Search engines when your Blog’s home page is displayed on Search Engines. Here is the snippet that I have given “Blogger Widgets provides you the best quality blogger tutorials.It also provides you with free blogger widgets and  gadgets to build a better blog.” Meta Tags For Blogger
    Meta description Tags displayed on Google
  2. Now when you make a Post, you can set the Meta Description from the Post Editor’s Post Settings  Sidebar. Meta description Tags For Blogger
    You can always edit the Search Description for existing posts as well
  3. If you are having a custom template, make sure that the following line of code is present in your template. To do that go to Template and Proceed to Edit HTML . Find
    <b:include data='blog' name='all-head-content'/>
    If it's not present, add it just before </head>
  4. That's It you have done it.
More

Custom 404 Error Pages for Blogger

"The 404 or Not Found error message is a HTTP standard response code indicating that the client was able to communicate with the server, but the server could not find what was requested." In simple words the page that will be displayed when the actual page is not found is called a 404 Error Page. Till now Blogger’s error page was a plain old design with more of orange in it and was not customizable. Now Blogger Error pages use the same template . This would help template designers in making up custom 404 Pages.This tutorial will help you in setting up a Custom 404 page for your Blog.
By Default, your Blogger Error page will display this error message
custom 404 page for blogger
You can Change this message to something else from the Blogger Settings.
The option is there at Settings > Search preferences > Custom Page not Found
blogger-custom-404-message
If you want more than just a message, then we will have to fill up this text area with some HTML Code.. This is how my Error page Looks like

Instructions

  1. Login to your Blogger account and go to the Template page and proceed to Edit HTML
  2. Click on the Expand Widget Templates Check box so that your entire template comes up
  3. Now Look for </head> and immediately before that paste this snippet
    <b:if cond='data:blog.pageType == "error_page"'>
    <style type="text/css">
    .status-msg-wrap {
    font-size: 100%;
    margin: none;
    position: static;
    width: 100%;
    }
    .status-msg-border {
    display:none
    }
    .status-msg-body {
    padding: none;
    position: static;
    text-align: inherit;
    width: 100%;
    z-index: auto;
    }
    .status-msg-wrap a {
    padding: none;
    text-decoration: inherit;
    }
    </style>
    </b:if>
    This code snippet will reset the default styling given to the Blogger Message Wrapper.
  4. Save the template and go to a page on your blog which doesn’t exist.
  5. You should be able to see the change now. The grey background and the border around the 404 status message would no longer be there.
  6. Now Let’s see how we can improve the look and feel of our 404 page. I would suggest you to use inline CSS styles to improve the look and Feel of your 404 message.Here is a sample HTML template which you can paste into the text box at Search preferences > Custom Page not Found.
    <h3>Your requested page was not found</h3>
    <p>Sorry, we cannot find the page that you are looking for. It might have been removed, had its name changed, or is temporarily unavailable.<br/>
    Please check that the Web site address is spelled correctly.</p>
    <b>Other things to try:</b><br/>
    <ul>
    <li>Go to our <a href="/">home page</a>, and use the menus or links to navigate to a specific post.</li>
    <li>
    <form method="get" action="/search">
    <table width="100%">
    <tr>
    <td><input type="text" style="width:95%;padding:2px;" value="Search this blog.." onfocus="if (this.value == &quot;Search this blog..&quot;) {this.value = &quot;&quot;}" onblur="if (this.value == &quot;&quot;) {this.value = &quot;Search this blog...&quot;;}" name="q"></td>
    <td><input type="button" Value="Search"></td>
    </tr>
    </table>
    </form>
    </li>
    </ul>
  7. It will give you something similar to my 404 page.
  8. If you are creative, you can add more stuff to the 404 pages. You can find a list of really creative 404 pages on HongKiat for inspiration

Detecting an Error Page

Blogger has introduced a new page type called "error_page" and you can detect it using b:if conditional tags.
The following condition checks if a page is an error page or not.
<b:if cond='data:blog.pageType == "error_page"'>
This is an Error Page
</b:if>

Changing the Error Page Title

By default the title of the Blogger Error Page is your Blog Title. If you want to change it to something else, you can Edit your template and change
<title><data:blog.pageTitle/></title>
to
<b:if cond='data:blog.pageType == "error_page"'>
<title>Page Not Found</title>
<b:else/>
<title><data:blog.pageTitle/></title>
</b:if>
If you are using my Title Tag Hack or derivatives of that available on the internet, then you will have to change
<!-- Start www.bloggerplugins.org: Changing the Blogger Title Tag -->
<b:if cond='data:blog.url == data:blog.homepageUrl'>
<title><data:blog.pageTitle/></title>
<b:else/>
<title><data:blog.pageName/><b:if cond='data:blog.pageName'> - </b:if><data:blog.title/></title>
</b:if>
<!-- End www.bloggerplugins.org: Changing the Blogger Title Tag –>
to
<!-- Start www.bloggerplugins.org: Changing the Blogger Title Tag -->
<b:if cond='data:blog.url == data:blog.homepageUrl'>
<title><data:blog.pageTitle/></title>
<b:else/>
<b:if cond='data:blog.pageType == "error_page"'>
<title>Page Not Found</title>
<b:else/>
<title><data:blog.pageName/><b:if cond='data:blog.pageName'> - </b:if><data:blog.title/></title>
</b:if>
</b:if>
<!-- End www.bloggerplugins.org: Changing the Blogger Title Tag –>

As I always say, if you get into troubles, you can use the comment form , Forum or our Facebook Wall :)
I’m sure that this is the first tutorial on Blogger 404 Pages on the Internet. Do share and keep us live :D
More

Gadgets for Blogger Dynamic Views

Blogger has introduced 6 awesome Gadgets for the Dynamic Views/Dynamic View Templates. The Widgets appear as a Floating Dock and expands when the user hovers over it.  These Gadgets matches up with the look and feel of the CSS3 powered Dynamic Views.
Gadgets for Blogger Dynamic Views

These are the list of Gadgets that Blogger has added to Dynamic Views
  1. Blog Archive
  2. Followers
  3. Labels
  4. Profile
  5. Link List
  6. Subscribe
You would already be familiar with the first 5 gadgets, but these are pretty different from the normal Gadgets. These are interactive and open up when the user hovers over the dock thereby saving some valuable space. The last gadget in the list(Subscribe) is a new Dynamic View Gadget which would be shown if you have added the Follow by Email or Subscription Gadget.

How to add these Gadgets to Dynamic Views ?

You just have to go to the Layout Page and add these Gadgets as you normally do. The docked gadgets will appear on your Dynamic view template or on your Blog’s Dynamic View .
I’m not using a Dynamic View Template, but you can see the new Gadgets in action on my Blog’s Dynamic View Pages. You can check out the demo at
http://www.bloggerplugins.org/view
If you want to see how these would look like on your blog. just append view to your blog’s main URL.
e.g : http://www.bloggerplugins.org/view
If you are still new to Dynamic Views, do check out this video
More

A Good Template Makes Your Site More Successful


Templates are the most important part of a successful website. Every successful site on the web has some sort of overall design structure, which adds to its beauty. A good structural design of headers, footers, navigation, and good content adds a user-friendly base to get around even in complicated sites. Fortunately, you can find a number of pre made templates that will set up a base for your website and all you need to do is enter your personalized text to make a site, which you desire. Many templates can be found free of cost on the internet.

Now, what is a Template? It is a page for your website that needs to be created only once which includes all the link structure information and designs with the content of each page either left blank or right blank. You then can make a copy of your desired template for each page and can fill in the content, rename it. Browsing a site which has different colour pages and has navigation links in different places can be frustrating at times.

So where to look for free templates that will give you a start? One place where you can find good templates easily is right in your web hosting panel. Most of the web hosts today use the common interface software called cPanel. It includes various types of different template options right in the site builders tab. No pre-existing knowledge is needed to work in cpanel as some of the options even have step by step methods on how to create. You just have to follow the steps and a template will be created for you according to your desire.

If you want your own custom template with some specific likings and features then there are many template files directly available for download, which will give you the type of template, which you can edit, and fill in just like any other HTML file.

Both free and pay templates are available on the template sites. You can simply Google "website template" or "free website templates" and you will have a large number of options. Usually the pay ones are designed in a better way, and they have a very less probability that other sites have the same template as that of yours.

Wordpress blog is another great option to build a site, which nowadays is becoming one of the most popular methods of site building. They are very simple to create. It just uses small form in your web-hosting panel and once you have the access to the Wordpress admin dashboard, it has a very easy way to find "theme" area that has hundreds of free blog templates to choose from and these templates are very adaptable to almost any site that you desire for.

Article Source : www.articlesnatch.com
More

Free Blog Templates for Blogger

Blogging may be the buzz word for the last five years, but it actually has been around since the internet started to spread across the country becoming an essential part of every US home. Even before the emergence of web 2.0, blogging was already meant to not only provide information, but also to share the opinions and thoughts of the bloggers. And today, blogging has evolved so much that stuff like "free blog templates for blogger" are one of the most popular searches made each day.

For the better part of the last decade, the number of bloggers has risen dramatically and this is partly due to the availability of free blog hosting sites like Blogger. Now owned by internet giant Google, Blogger is one of the earliest free blogging sites to come out and was purchased by Google when the blogging industry started to explode. After the transition of ownership, Blogger integrated numerous innovations which made it easy for anyone to use and opened up the use of premium features that were previously reserved for those willing to pay for their use.

One of these features, which also received a major revamp, was its template editing feature. It introduced an extremely user friendly editing option which allowed the user to customize the layout and the page elements of your blog. With just a few clicks you can change the fonts, colors, sidebar contents, header, and all the other options you may want, especially with revenue generating ads like AdSense.

If you really want to have a more personalized look for your Blogger account, it's even possible to download free blog templates for blogger and customize it even further. These free templates are already great as they come, but to avoid any chance of another blogger site having downloaded the same template and using it, you can just treat the template as an empty canvas and from there customize it to further make it your own.

The best thing about free blog templates for blogger is the fact that they are free, plus, if you don't have the skills to create your own template, this will save you a lot of time in learning how to do it and starting from scratch in building one. You also save money from having to purchase one or hire the services of a template designer to create a customized template for you.

Article Source: EzineArticles.com
More

Basic Uses And Guides To Modifying Blogger Templates


Bloggers are people who create blogs. Templates are ready to use documents or applications specifically designed for easy use or modification. So a blogger template by definition, is an application that is made to be used or modified by bloggers for creating a blog. A lot of these templates are available in the internet. Some are free while others are for sale. These blogger templates are beneficial to people who wouldn't want to pay big amounts to hire website designers or professional blog designers. This is a very efficient way to minimize your cost while maximizing the opportunity for a good advertisement.

A lot of companies nowadays turn to the internet to promote their products. It promotes savings and at the same time, the internet can reach a wider range of audience. Almost everyone in the world has access to the internet, no wonder millions of blogs are created everyday. Companies capitalize on this trend. Advertising in the internet through blogs is just a fraction of the cost compared to other means of advertising.

If you are a blogger looking for a template, there are several things that you should consider. You need to take into consideration if the template fits your objective on why you are creating a blog. You consider as well if it's easy to modify to fit the needs of your blog. Also you must see if the applications on the template are easy to use and is compatible to other applications readily available to you or through the internet.

Always remember that your web template should always match your blog design so that it will attract viewers and visitors. This will ensure that your blog will be frequently visited by internet users. There are thousands of free to download blogger templates in the internet; you won't run out of new designs to choose from. And the steps to modify these templates are available upon downloading. The steps generally apply to all templates. It involves an easy series of copying and pasting of codes. You simply supply the template with the information and it will automatically format based on your desired outcome.

People want constant changes, they want continuity and won't settle for old and outdated blogs. When you enter a blog that is boring, unattractive and lifeless, the first thing that comes in mind is that who ever owns this site has nothing new to offer, way past prime or is outdated and don't even have money to pay for a designer, or in short you get turned off and won't even click on links and simply exit the site. When that happens, the owner loses the opportunity to sell and prosper. That's why a good, updated and attractive blog is needed especially if it is used for business as it reflects good standing.

Article Source : www.articlesnatch.com
More

How to Apply A WordPress Theme


One of the biggest advantages to WordPress is the easy to use theme system. This makes changing your blog or websites design a really easy task. Best of all, many themes are available for free of charge. The key is to learn how to use the theme system so you do not waste your time trying to figure out why your theme is not working.

If you want to apply a WordPress theme, the first step is making sure you have the theme installed. There are two different ways that a WordPress theme can be installed. The first option is to install it manually by uploading the theme folder to your themes directory. This requires some knowledge of FTP and web directories.

The second option is to use the build in theme uploader, which can be accessed from directly in the WordPress administration panel. To get started, just browser to the appearance section in WordPress and click on the themes section. One in here, you can just click on the add new theme button to get started. You can either search for a theme in the directory or choose the zip file you downloaded from somewhere else on the internet.

Regardless of the way you choose, WordPress will automatically install the theme for you and place it in the correct folder. Once this is done, you are then ready to apply the WordPress theme.

Guess what? Activating the theme is even easier than installing it! All you have to do is look at your installed themes and choose the one you want to use. Then just use the activate link to automatically apply any given them. Within a matter of seconds, your entire blog or website layout will completely change based on the theme you are using. Talk about an easy way to design websites!

Article Source: EzineArticles.com
More

Ultimate Blogging Theme - My Favourite WordPress Theme

Recently I have been working on to change the color of the title name and fonts of my blog and I tried several plugins, but I am not satisfied with the results. Fortunately I found a very Google friendly WordPress theme, named "Ultimate Blogging Theme". I love it.

Firstly, I found Ultimate Blogging Theme is very convenient. I just need to choose my blog layout that I like, color scheme, advertising position, social bookmarking, etc. Actually I changed the font size, color of blog title, description, header box heading, content body and others from the fonts section in UBT headquarters easily. And when I add a new page, it can be added into navigation menu automatically.

The second is that Ultimate Blogging Theme is simple and easy to use. Setting up an eye-catching blog looks like a piece of cake by following the Ultimate Blogging Theme setup video. The step-by-step video tutorial shows how to install UBT, how to choose blog layout, where to pick social bookmarking, and how to set up the widgets, and so on. I just followed and completely set up the theme in a few minutes.

And I also appreciate the advertising placements have already been there. Ultimate Blogging Theme has been developed by a well-known successful kid blogger Carl Ocab. He has tested and found the best ads placements on blogs, and in these designed places visitors tend to click through ads. And these places are header ad, content ad, middle ad, footer ad. I put in my ads in these places directly for they have suggested sizes already.

The other thing I like Ultimate Blogging Theme is that the purchase is one time payment and it offers me free updates in my life time. This theme has already included custom style sheet and custom functions, so when I want to update in the future, my customization will not lose. It has been tested and proven to produce the best results on-page SEO.

So if you are looking for a Wordpress theme simple and easy to use, I highly recommend you take Ultimate Blogging Theme a shot. If you try to get your blog optimized and give you a lot of free traffic, you can click here to get more information on this Google friendly WordPress theme.

Article Source: EzineArticles.com
More

Show off your favorite blogs with a Blog List

Show off your favorite blogs with a Blog List Today we’re releasing a new page element for Layouts blogs: Blog List. The Blog List improves on our Link List page element by using blogs’ RSS and Atom feeds to show update times, post titles, and snippets. Use a Blog List to put a blogroll in your sidebar, or make a few to categorize the blogs you read. The Blog List works well for any page that has an RSS or Atom feed, so you can get creative: link to news sites, podcasts, Twitter streams, search results, or anything else with a feed. Here’s a quick summary of the features that a Blog List gives you: Link to blogs, web pages, and feeds from your blog’s sidebar, with an optional favicon For pages with RSS and Atom feeds, Blog List can show last updated time, post title, and a snippet of the latest post Sort links alphabetically or by last update time Show all links, or hide some behind a “show all” link Import subscriptions from Google Reader Blog List links are visible to search engine crawlers, so your blog’s PageRank and reputation flow to those you link to Want to see it in action? We made a help video to walk you through adding and configuring a Blog List: Thanks go out to everyone who chimed in on the Blogger in draft blog while this feature was being developed. You helped us a lot! Tip: Want to show more posts from a single blog? Use the Feed page element to put any RSS or Atom feed in your blog’s sidebar.
More

Gadget สุ่มบทความอัตโนมัติแบบ Headline News

Gadget นี้มีข้อดีตรงที่จะทำให้ทุกบทความของเราถูกสุ่มขึ้นมาให้ผู้อ่านเห็นในหน้า แรกอยู่เสมอ ซึ่งแนวคิดก็เหมือนกับการแสดงข้อความวิ่งตามท้องถนนหรือ หน้าจอทีวี ทำนองนั้นครับ วิธีติดตั้งไม่ซับซ้อนครับ แต่โค้ดออกจะยาวหน่อยนะครับ อดทนแก้นิดหน่อยก็ได้ Gadget นี้ไปครอบครองแล้วครับ ส่วนตัวอย่างก็ชมได้ที่ด้านบทของบทความนี้ หรือดูจากรูปด้านล่างได้เลยครับ
2009-11-26_222526
วิธีการติดตั้ง
ไป ที่แผงควบคุม >> รูปแบบ Add Gadget ในตำแหน่งที่ต้องการ  >> เลือก Gadget ชนิด HTML/จาวาสคริปต์   >>  วางโค้ดด้านล่างนี้ลงไปแก้ไขตามต้องการ โดยไม่ต้องตั้งชื่อแล้วทำกับบันทึก

<style type="text/css">
.gfg-root {
width : 100%;
height : auto;
position : relative;
overflow : hidden;
text-align : center;
font-family: "Arial", sans-serif;
font-size: 8px;
border: 1px solid #AAAA8A;
}
.gfg-title {
font-size: 16px;  /* ขนาดอักษรที่หัว */
font-weight : bold;
color : #EDECEC;
background-color: #8F8383; /* สีพื้นหลังที่หัว */
line-height : 1.4em;
overflow : hidden;
white-space : nowrap;
}
.gfg-title a {
color : #360000;
}
.gfg-subtitle {
font-size: 12px;
font-weight : bold;
color : #E5A835;
background-color: #9DA278;
line-height : 1.4em;
overflow : hidden;
white-space : nowrap;
margin-bottom : 0px;
}
.gfg-subtitle a {
color : #DDB06F;
display:none !important;
}
.gfg-entry {
background-color : white;
width : 100%;
height : 6.9em;
position : relative;
overflow : hidden;
text-align : left;
margin-top : 3px;
}
/* To allow correct behavior for overlay */
.gfg-root .gfg-entry .gf-result {
position : relative;
background-color : white;
width : auto;
height : 100%;
padding-left : 20px;
padding-right : 5px;
}
.gfg-list {
position : relative;
overflow : hidden;
text-align : left;
margin-bottom : 5px;
display:none !important;
}
.gfg-listentry {
line-height : 1.5em;
overflow : hidden;
white-space : nowrap;
text-overflow : ellipsis;
-o-text-overflow : ellipsis;
padding-left : 15px;
padding-right : 5px;
margin-left : 5px;
margin-right : 5px;
}
.gfg-listentry-odd {
background-color : #F6F6F6;
}
.gfg-listentry-even {
}
.gfg-listentry-highlight {
background-image : url('garrow.gif');
background-repeat: no-repeat;
background-position : center left;
}

/* FeedControl customizations.*/
.gfg-root .gfg-entry .gf-result .gf-title {
font-size: 12px; /* ขนาดอักษรหัวข้อบทความ */
line-height : 1.2em;
overflow : hidden;
white-space : nowrap;
text-overflow : ellipsis;
-o-text-overflow : ellipsis;
margin-bottom : 2px;
}
.gfg-root .gfg-entry .gf-result .gf-snippet {
height : 3.8em;
color: #ACACAC;
margin-top : 3px;
}

/*Easy way to get horizontal mode, applicable via js options to gadget.*/
.gfg-horizontal-container {
position : relative;
}
.gfg-horizontal-root {
height : 1.5em;
_height : 100%;
position : relative;
white-space : nowrap;
overflow : hidden;
text-align : center;
font-family: "Arial", sans-serif;
font-size: 10px;
border: 1px solid #AAAAAA;
padding : 5px;
margin-right : 80px;
}
.gfg-horizontal-root .gfg-title {
font-weight : bold;
background-color: #FFFFFF;
line-height : 1.5em;
overflow : hidden;
white-space : nowrap;
float : left;
padding-left : 10px;
padding-right : 12px;
border-right: 1px solid #AAAAAA;
}
.gfg-horizontal-root .gfg-title a {
color : #444444;
text-decoration : none;
}
.gfg-horizontal-root .gfg-entry {
width : auto;
height : 1.5em;
position : relative;
overflow : hidden;
text-align : left;
margin-top : 0px;
margin-left : 0px;
padding-left : 10px;
}

/* To allow correct behavior for overlay */

.gfg-horizontal-root .gfg-entry .gf-result {
position : relative;
background-color : white;
width : 100%;
height : 100%;
line-height : 1em;
overflow : hidden;
white-space : nowrap;
}
.gfg-horizontal-root .gfg-list {
display : none;
}

/* FeedControl customizations.*/

.gfg-horizontal-root .gfg-entry .gf-result .gf-snippet,
.gfg-horizontal-root .gfg-entry .gf-result .gf-author {
display : none;
}
.gfg-horizontal-root .gfg-entry .gf-result .gf-title {
color: #0000cc;
margin-right : 3px;
float : left;
}
.gfg-horizontal-root .gfg-entry .gf-result .gf-spacer {
float : left;
}
.gfg-horizontal-root .gfg-entry .gf-result .gf-spacer,
.gfg-horizontal-root .gfg-entry .gf-result .gf-relativePublishedDate {
display : block;
color: #AAAAAA;
}
.gfg-branding {
white-space : nowrap;
overflow : hidden;
text-align : left;
position : absolute;
right : 0px;
top : 0px;
width : 80px;
}
.gfg-collapse-open, .gfg-collapse-closed {
background-repeat : no-repeat;
background-position : center;
cursor : pointer;
float : right;
width : 17px;
height : 20px;
}
.gfg-collapse-open {
background-image : url('arrow_open.gif');
}
.gfg-collapse-closed {
background-image : url('arrow_close.gif');
}
.gfg-collapse-href {
float : left;
}
.clearFloat {
clear : both;
}
#feedGadget {
margin-top : 5px;
margin-left: auto;
margin-right: auto;
width : 500 px; /* ขนาดของ Gadget */
font-size: 10px;
color: #920000; /* สีของอักษรขณะรอโหลด */
}
</style>
<noscript><a href=http://ใส่ชื่อบล็อกของคุณ.blogspot.com target="_blank">Blogger Hacks</a></noscript>
<script src="http://www.google.com/jsapi/?key=internal-sample"
type="text/javascript"></script>
<script src="http://www.google.com/uds/solutions/dynamicfeed/gfdynamicfeedcontrol.js" type="text/javascript"></script>

<script type="text/javascript">

function showGadget() {
var feeds = [
{title:'title',
url:'http://ใส่ชื่อบล็อกของคุณ.blogspot.com/atom.xml?redirect=false&start-index=1&max-results=999'},

];

new GFdynamicFeedControl(feeds, 'feedGadget',
{numResults : 1000, stacked : true,
title: "ใส่หัวเรื่องของคุณ"});
}
google.load("feeds", "1");
google.setOnLoadCallback(showGadget);
</script>
<noscript><a href="http://ใส่ชื่อบล็อกของคุณ.blogspot.com" target="_blank">Blogger Hacks</a></noscript>
<div id="feedGadget">ใส่ข้อความขณะรอดาวน์โหลดครับ</div>


แก้ไขค่า/ข้อความสีแดงให้ครบถ้วนตามความพอใจ และบันทึกก็จบขั้นตอนครับ

หากมีข้อสงสัยเชิญสอบถามได้เลยครับ
ที่มา http://www.hackublog.com/2009/11/gadget-headline-news.html
More
 
Support : Your Link | Your Link | Your Link
Copyright © 2013. bbc world - All Rights Reserved
Template Created by Creating Website Edited by Kompi Ajaib
Published by Mas Template Proudly powered by Blogger